Configuring RTC on Windows machine with Microsoft SQL Server has its own set of challenges. This is a high level blog about installation and configuration of IBM Rational Team Concert (RTC) on Windows Server 2008 R2 and use Microsoft SQL Server 2008 R2 as the backend.
We’ll cover following topics in this blog:
1. Installation of RTC Server
2. SQL Server Configuration
3. Configuring the application
My environment:
Windows Version: Windows Server 2008 R2 [64 bit]
SQL Server: Microsoft SQL Server 2008 R2 [32 bit]
Before proceeding further with the installation, please make sure that your system meets the system requirements mentioned here – https://jazz.net/library/article/632
1. Installation of RTC Server
First thing first, you’ll need an account on http://jazz.net. Register yourself and create a new account if you already do not have one! You’ll need this account for almost everything related to RTC. Logon to http://jazz.net and go to RTC download page: https://jazz.net/downloads/rational-team-concert/. Download the correct version based on your platform. In this post I’ve written about installation and configuration of Rational Team Concert 3.0.1.2 (https://jazz.net/downloads/rational-team-concert/releases/3.0.1.2) on 64 bit Windows operating environment.
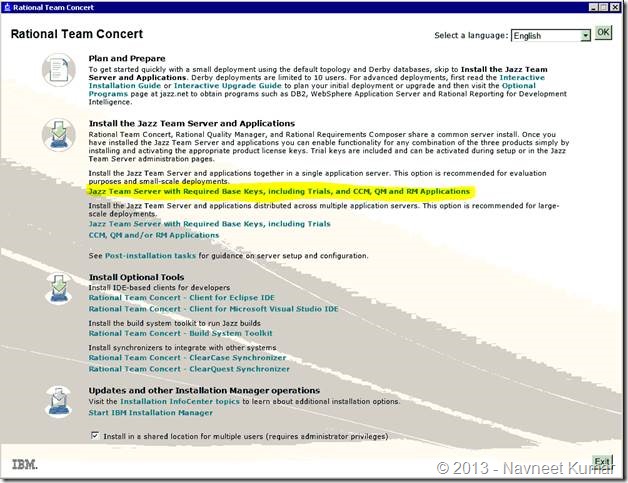
First few steps are pretty straight forward. Extract the contents of the zip file – RTC-Web-Installer-Win-3.0.1.2.zip to a folder and run Launchpad.exe. This will launch the RTC installer as shown in the screenshot below:
Click on “Jazz Team Server with Required Keys, including Trials, and CCM, QM and RM applications”. This will launch the IBM Installation Manager and you’ll be authenticated (using the username and password which you used for logging into http://jazz.net).
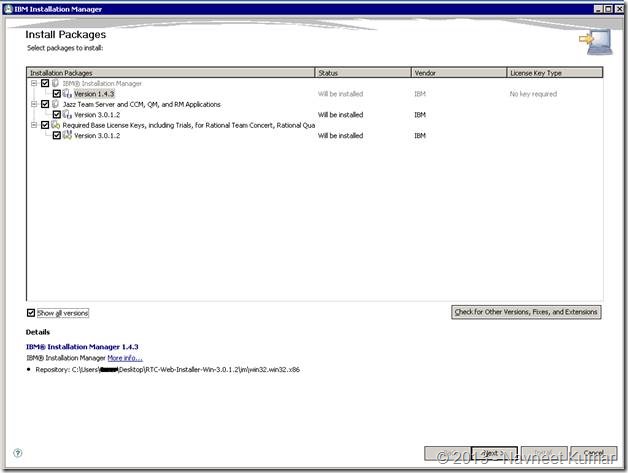
Select all the packages which you would like to install on the server. I selected all the packages:
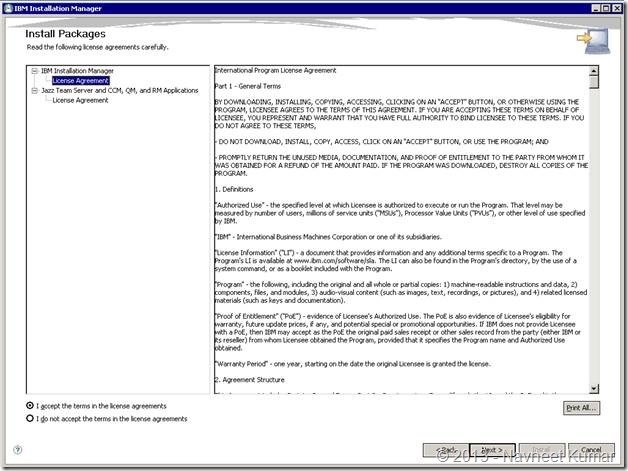
Click on Next> button once you have selected the packages. This will take you the License Agreement Page. Next button will get enabled if you click on the checkbox – I accept the terms in the license agreements.
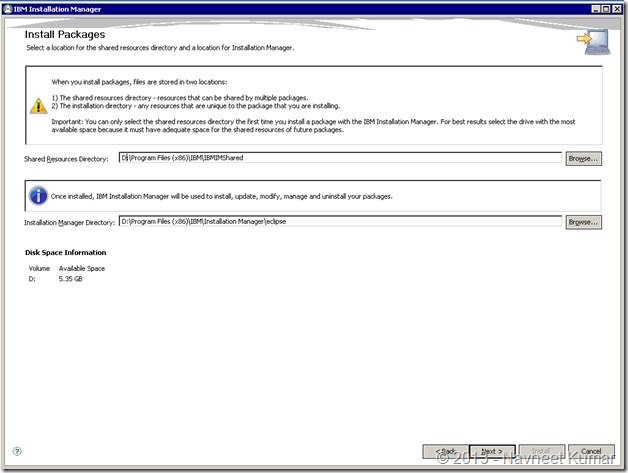
Click Next on the license agreement page. This will you to the next page where you need to specify the Installation manager directory and shared resources directory as shown in the screenshot below:
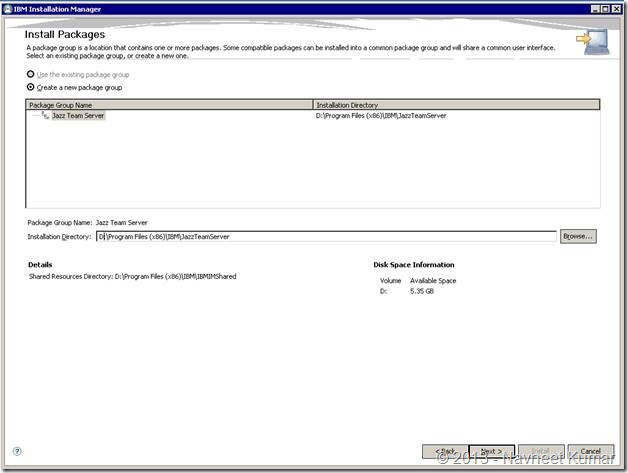
Clicking next will bring you the package selection page. Here you can create a new package group if you are installing RTC for the first time on the server. You’ll also have to specify the installation directory for the new package group:
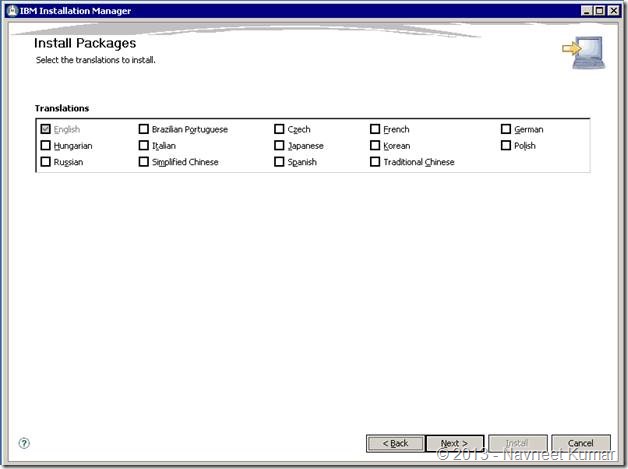
You can select the translations on the next page. I didn’t select any language on this page. English was selected by default.
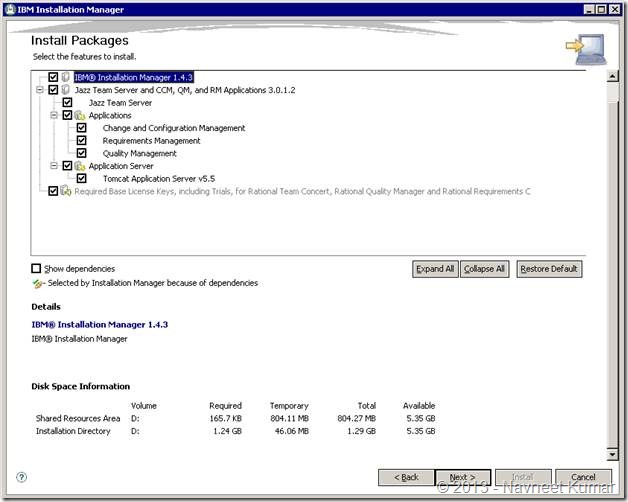
Select all the features that you would like to install on the next page. I have selected all the features.
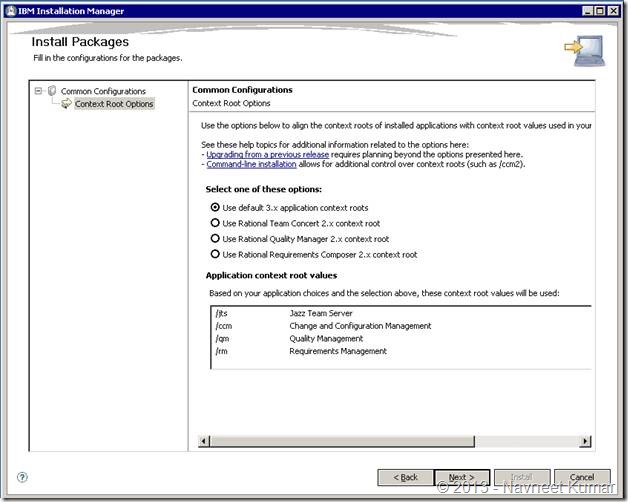
On next page you’ll have to select the context roots of all the installed applications. These applications are Jaaz Team Server, Change and configuration management (CCM), Quality Management (QM) and resource management (RM). I decided to go with the default 3.x application context roots.
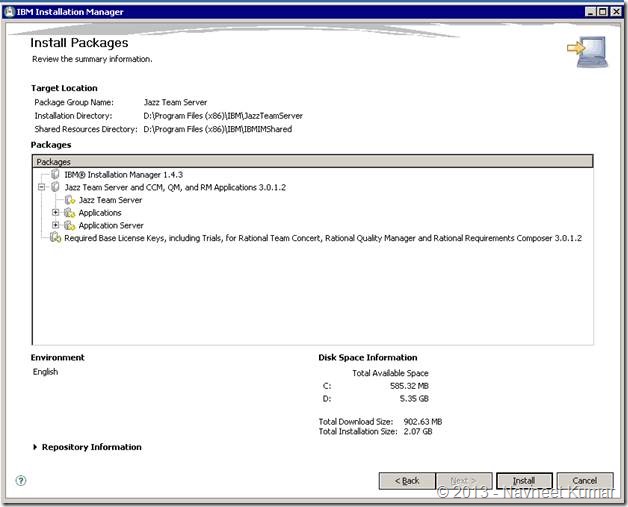
On next page you can review the installation summary and press the install button. Installation starts as soon as you press the install button
This will download the latest files from the server and deploy it on your machine. Please make sure that you have an active Internet connection available.
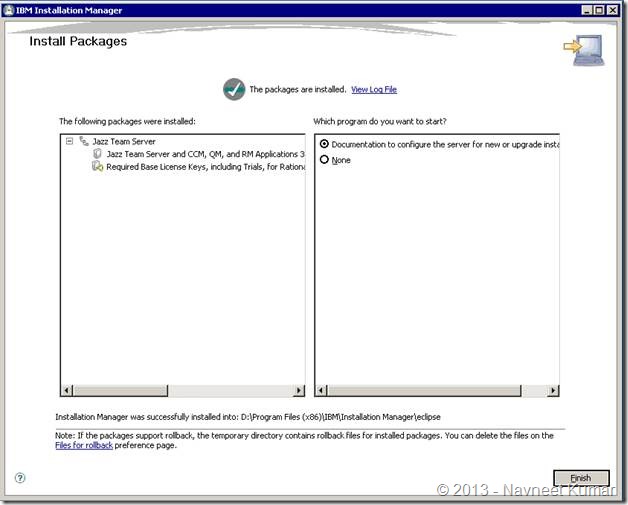
Press the finish button once the installation is over. This will bring up an article in RTC documentation to configure the server. You can read the documentation online at following location – http://pic.dhe.ibm.com/infocenter/clmhelp/v3r0m1/index.jsp?topic=/com.ibm.jazz.install.doc/topics/c_post_install.html
2. SQL Server configuration
The next is configuration of the database server. I have used 32-bit Microsoft SQL Server 2008 R2 as database server. There were some challenges related to JDBC driver configuration which I ran into. Thankfully I was able to resolve it. Here are the steps:
First you’ll have to download and install the JDBC Driver. JDBC Driver 2.0 can be downloaded from Microsoft website at following location – http://www.microsoft.com/downloads/details.aspx?FamilyID=99b21b65-e98f-4a61-b811-19912601fdc9&displaylang=en
Please refer to following page for detailed information on SQL Server configuration – http://pic.dhe.ibm.com/infocenter/clmhelp/v3r0m1/index.jsp?topic=%2Fcom.ibm.jazz.install.doc%2Ftopics%2Ft_s_server_installation_setup_sql.html
Other than the steps mentioned in the documentation above, here are few other things which came handy:
1. Use following command to get version on JVM – %installdir%\IBM\JazzTeamServer\server\jre\bin>JAVA –version
2. Also make sure that users have full access on %installdir%\IBM folder
3. Another simple way is to create a new folder “sqlserver” under the installation directory and place the driver in that directory. Please refer to comments from Walter Mansur given on Aug 03 ’11, 9:09 a.m at following location – https://jazz.net/forum/questions/60079/cannot-create-jazz-database-tables-sql-server
4. User following command to verify SQL Server configuration – %installdir%\IBM\JazzTeamServer\server>repotools-jts.bat –verify
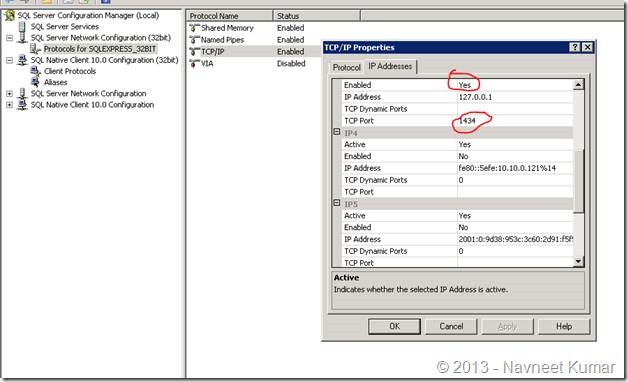
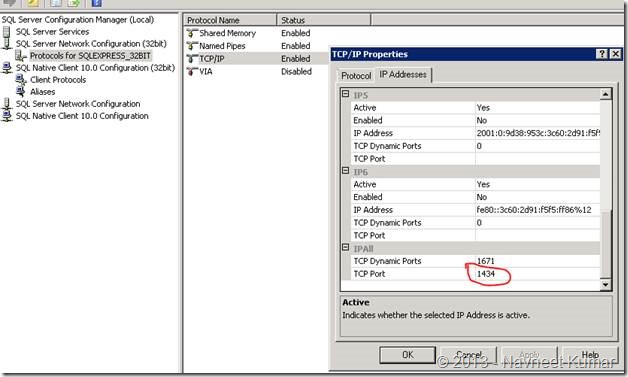
Optionally, you can also configure the port number of the SQL Server. In our case, we were using 32 bit SQL server with named instance, so we had to configure the TCP IP port for the instance
3. Configuring the application
1. Apache server configuration
If you would like to change the default ports for SSL and non-SSL you’ll have to configure the server.xml located at following path:%installdir%\IBM\JazzTeamServer\server\tomcat\conf\server.xml
Default port for SSL is 9443 and for non-SSL is 9080. I changed it to 443 for SSL and 8080 for non-SSL. Here are the relevant sections from server.xml:
<!– Define a non-SSL HTTP/1.1 Connector on port 9080 –>
<Connector port=”8080” maxHttpHeaderSize=”8192″
maxThreads=”150″ minSpareThreads=”25″ maxSpareThreads=”75″
enableLookups=”false” redirectPort=”443″ acceptCount=”100″
connectionTimeout=”20000″ disableUploadTimeout=”true”
URIEncoding=”UTF-8″ />
<!– Define a SSL HTTP/1.1 Connector on port 9443 –>
<Connector port=”443”
connectionTimeout=”20000″
maxHttpHeaderSize=”8192″
maxThreads=”150″
minSpareThreads=”25″
maxSpareThreads=”75″
enableLookups=”false”
disableUploadTimeout=”true”
acceptCount=”100″
scheme=”https”
secure=”true”
clientAuth=”false”
keystoreFile=”ibm-team-ssl.keystore”
keystorePass=”ibm-team”
sslProtocol=”${jazz.connector.sslProtocol}”
algorithm=”${jazz.connector.algorithm}”
URIEncoding=”UTF-8″ />
You can read more about this here – http://pic.dhe.ibm.com/infocenter/clmhelp/v3r0m1/topic/com.ibm.jazz.install.doc/topics/t_ports_change.html
2. Starting up RTC server and administrative login:
Use following command: IBM\JazzTeamServer\server> .\server.startup.bat
Login to https://localhost/jts/setup
Username: ADMIN
Password: ADMIN
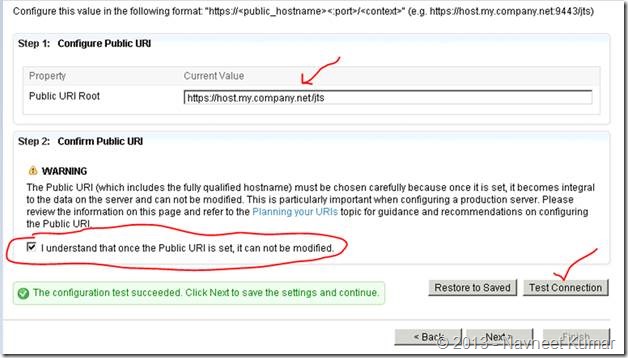
You can now configure the public URI of the RTC Server. This is particularly important if you are planning to have RTC server is accessible over the Internet. I had to make sure that both 8080 and 443 port are open on the firewall so that users can access RTC over the Internet.
3. Configuring databases, email and other misc. configuration
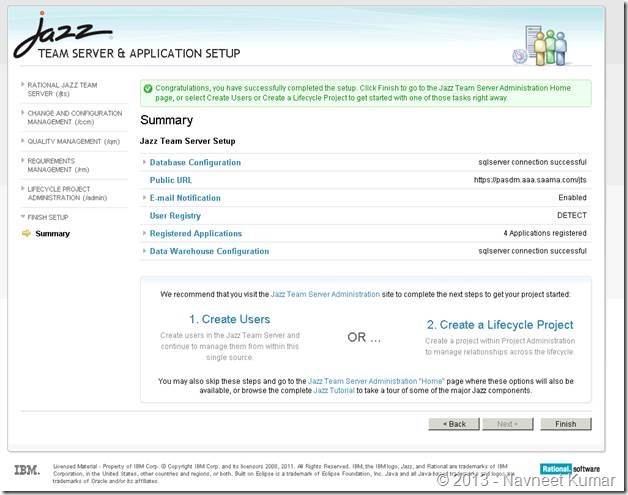
I have put together the screenshots of remaining configurations. Screenshots are mostly self-explanatory.
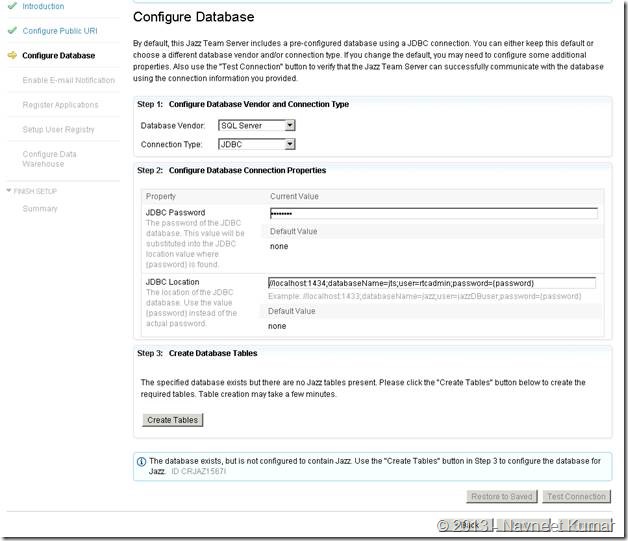
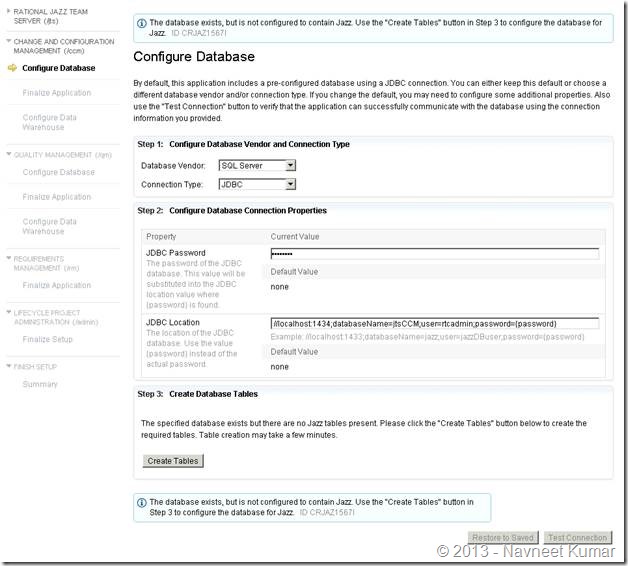
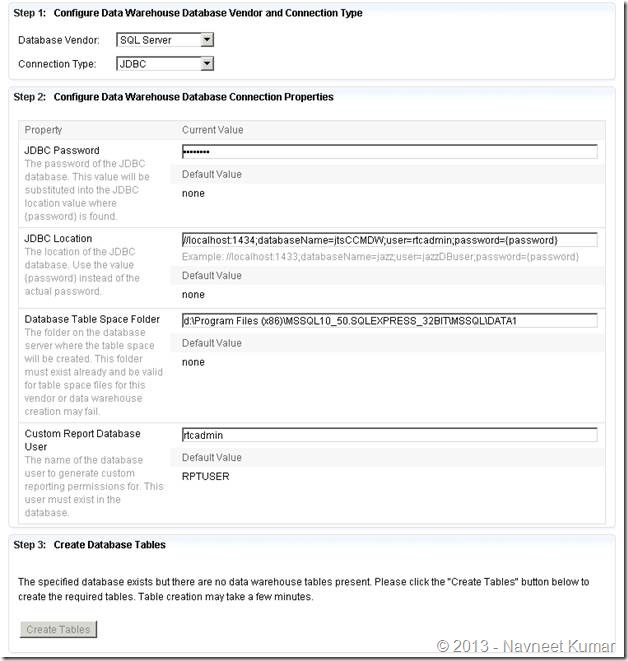
This screenshot shows the database configuration page for Jazz Team Server. Take a note of JDBC Connection string used here with the custom port – 1434.
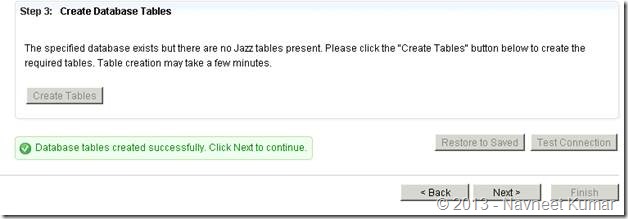
Create tables by clicking button
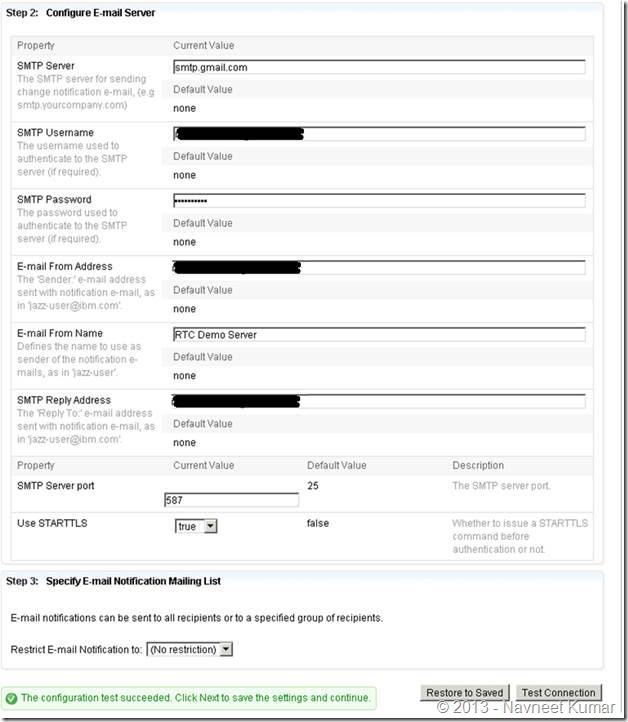
Email configuration:
I have configured my Gmail as my email server. Read more about email configuration here:
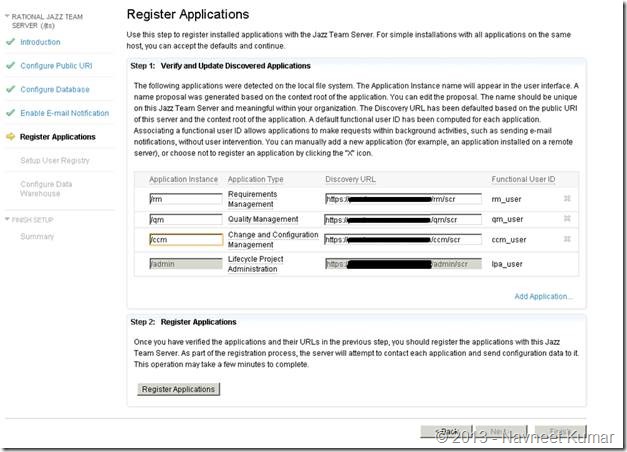
Application registration:
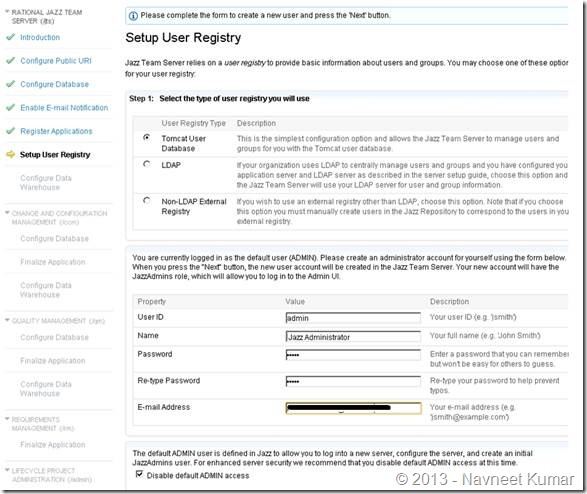
Setup user registry:
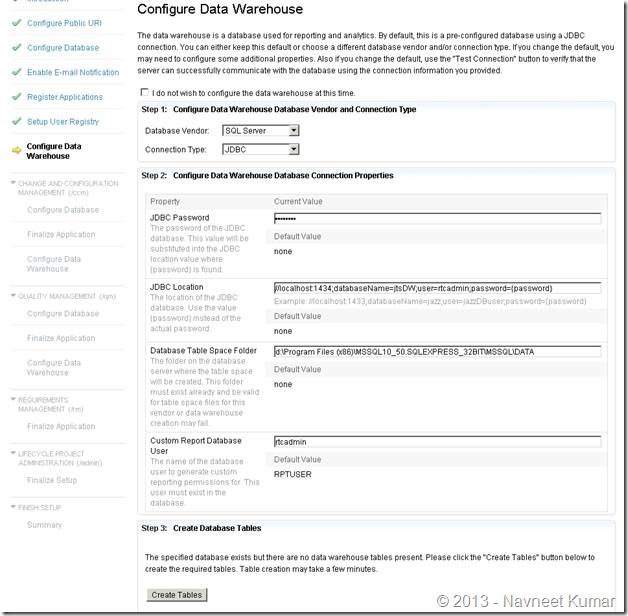
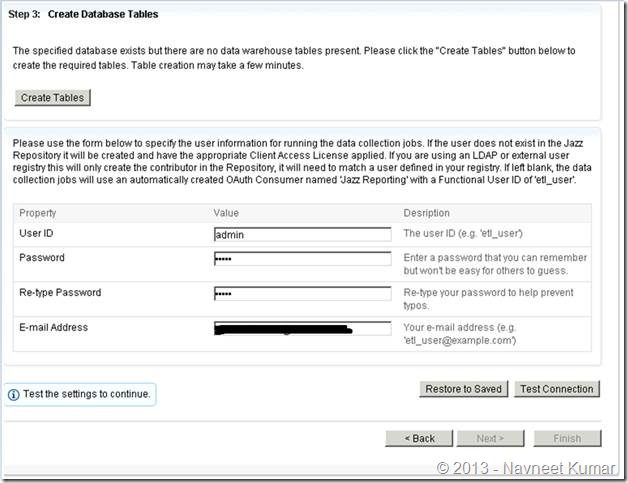
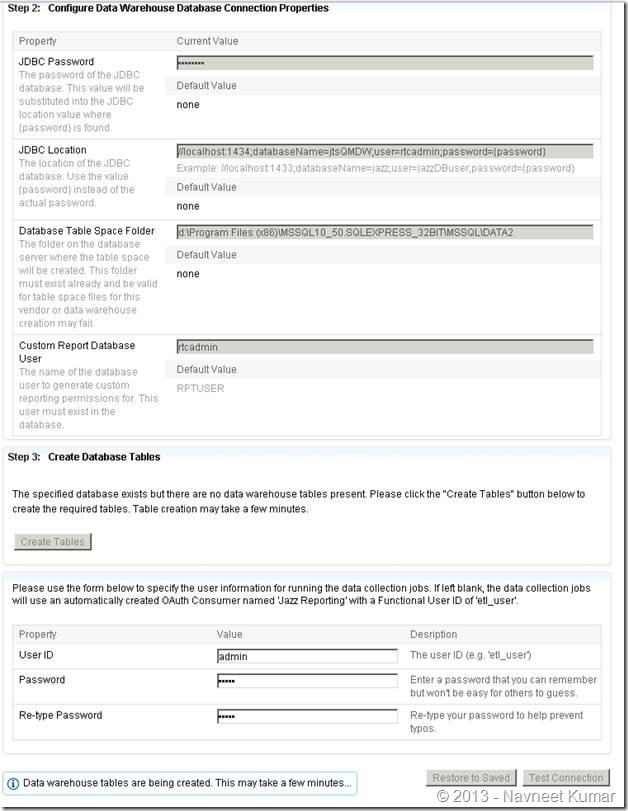
Configuring data warehouse
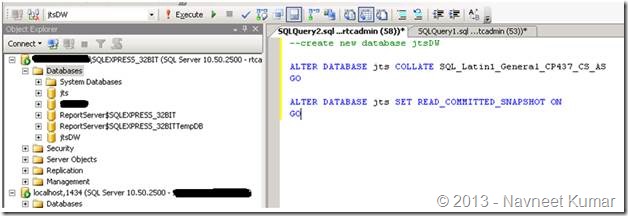
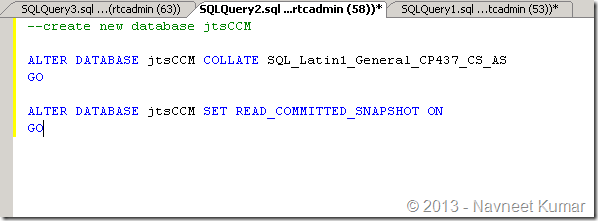
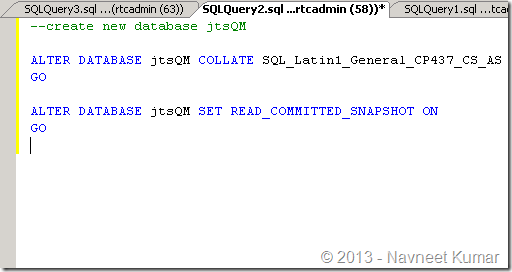
1. Create db with collation
CCM configuration
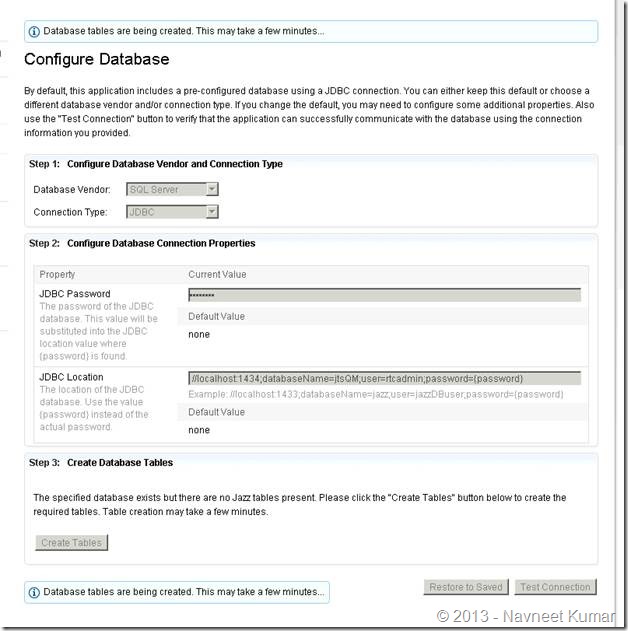
QM
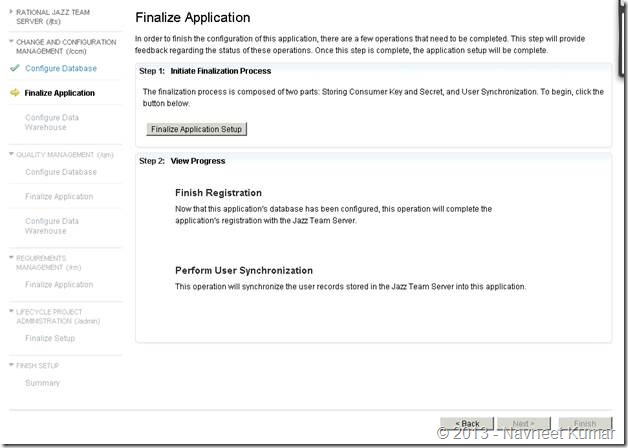
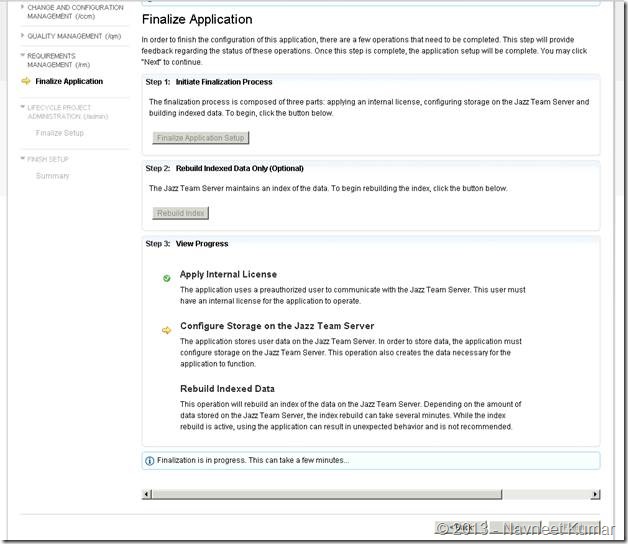
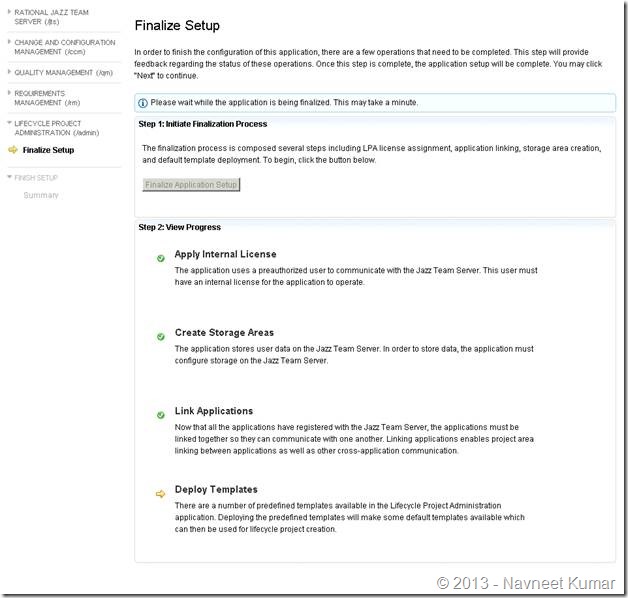
FINALIZE

